Showing posts with label Crafts/DIY. Show all posts

Creating a Gallery Wall

Creating a Gallery Wall
A gallery wall is a collage of different articles to cover an entire space. Articles are of different shapes, sizes, and proportions. Think of it as an accent wall. It's a fun and creative way to add personality to most any room!
_________________________________________________________

Collecting Items
  • Imagery
    • Collect any and all pieces of your favorite art. This can be framed images, unframed pieces, canvas, posters, photographs, printed pictures, and so on...
  • Decorations
    • Sames goes for decorations! Collect items such as wall decal stickers, flags, string lights, faux string plants, clocks, mirrors and so on. Basically, find things other than imagery that can be hung on the wall.
  • Bulletin Board
    • Bulletin boards are great because they fill up a pretty decent sized space. They can be useful for unframed photographs, loose papers, and smaller things to be pinned on.
  • Shelves
    • Shelves make for easy gap fillers. Floating shelves make for a nice option even. This way, for things that can't be hung on the wall, they can be nice to hold other decorative objects.
Decorating
  • Placement
    • It's all about how you feel when it comes to making your own gallery wall. Think about it for a while; draw out some of your art and how it would display on your wall, take a moment to figure out a good arrangement. For me personally, since I actually have a small gallery wall in my room, I thought about the bigger pieces and the ones I deem as more important in my range of sight. These are what I placed first. Then I filled in gaps with smaller pictures and whatnot.
  • Hanging Up
    • As soon as you have a plan in mind, you can start hanging art up. The fun part is putting different textures together, colors, and really creating a solid accent wall of memories. The thing I really enjoy about gallery walls are the fact that nothing set in place is perfect. Everything is truly combined with creativity and enjoyment!
_________________________________________________________

Source: N/A 

Creative Ways to Decorate Your Graduation Cap


Creative Ways to Decorate Your Graduation Cap
Your final assignment counts for no grade! Be creative and have fun all the while celebrating a year of accomplishment because you've earned it. Graduation caps are a memory you can add personality to and preserve with a creative touch. Leave a comment if you have more ideas to share that aren't included on this list. Thank you! :)
_________________________________________________________

Floral Crown Not directly on the top, but on the crown of your head (think floral crown but with the cap still on) arrange and adhere some flowers. This is so adorable and leaves plenty of room on the top for a quote or saying if you wish.


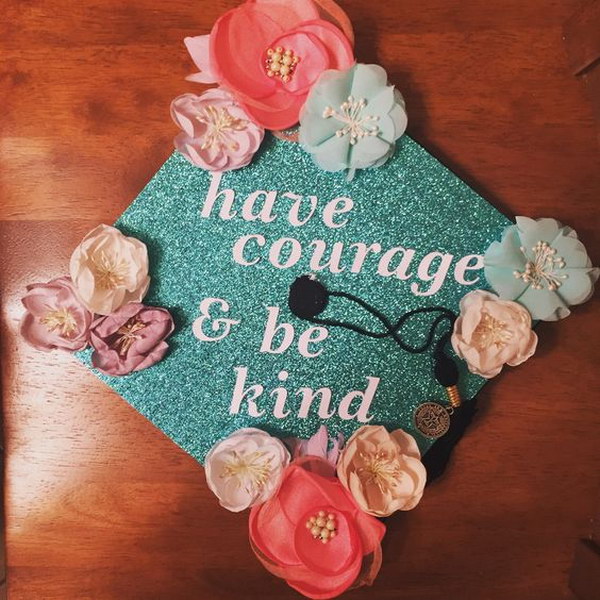
Floral Corners/Edges Add faux flowers to the top corners or edges. It's like a border which can be in the corners of the cap or filling around the entire square. Still allows for plenty of room in the middle to place other designs.

Stickers Stickers or iron ons are a great option when it comes to easy decoration. You can use any sort of stickers from flowers, letters, and so on.


Graphic Paper
Graphic paper can be anything from floral to your favorite television character. Visit the craft store and pick out paper or print a design and glue to the headwear. Adding floral paper is an easier way to place flowers. Cut a grouping of flowers from chosen paper and paste onto cap corners. Another simple way to decorate is cutting a square to fit the entire cap using it as a background. I've seen glitter paper used most often. It's easy to then decorate, having the background give everything a bit more personality.


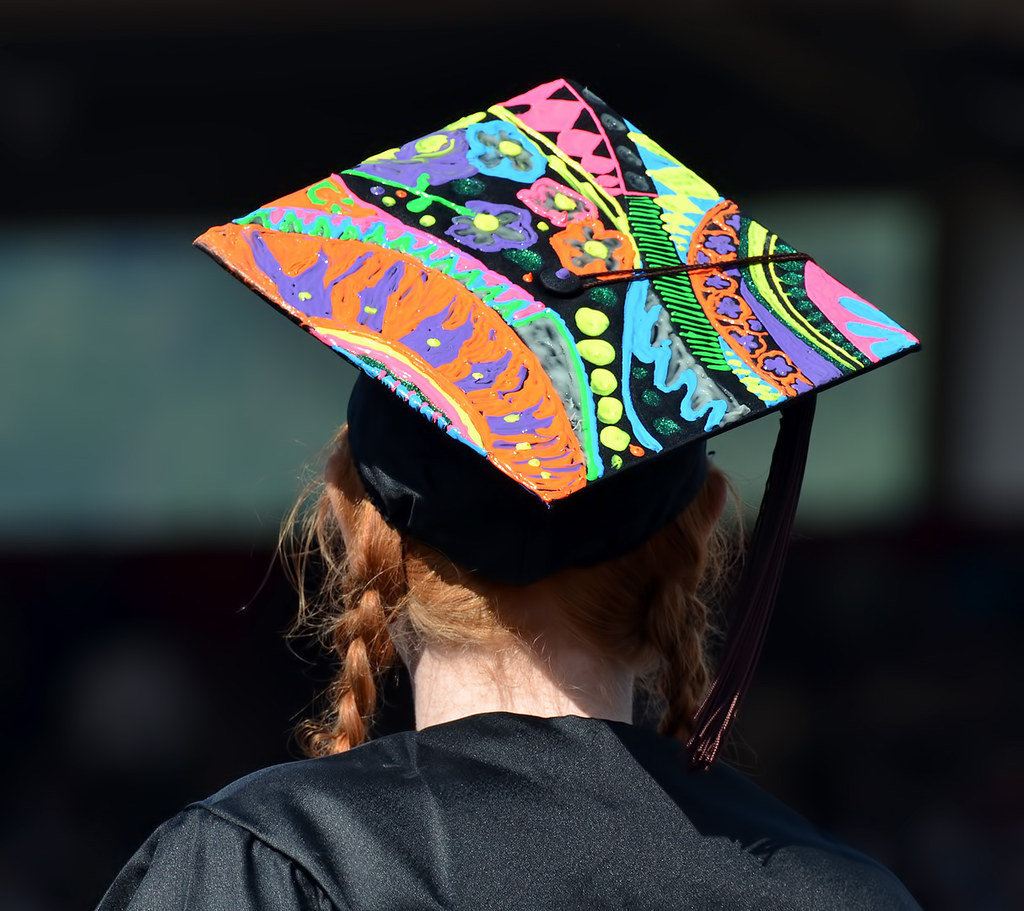
Paint Create a masterpiece with your graduation head piece! Fabric paint will be best for this project. Of course, if using glitter or confetti with the paint, all will dry leaving your creation sparkle!


Beads/Gemstones Beads will add texture like no other. Glue the beads directly to the cap. Pearls for example, will give you a classy look. Use beads for borders or faux gemstones to trace letters or even, give flair to flowers. Bling is always in style!


Ribbon Lace ribbon? Yes please! Such exquisite taste you have! Lace makes for perfect borders. Grab yourself a wider ribbon even and tie a big bow. Place the bow in the corner that will go on back of your head. Stunning indeed!


Tassel It was worth the hassle, right? A minimalist way to decorate your tassel is by stringing up some beads and flowers. Create a pattern with those embellishments as if you're making a necklace or bracelet. Such a fun way to sport your school colors.


_________________________________________________________

Sources: N/A

{DIY} Shirt Collar Necklace


{DIY} Shirt Collar Necklace

Recently saw this idea on a Dhar Mann video from YouTube and had to share it with you all because I'm literally obsessed! It's a creative idea which finds a new use out of old collared shirts. It's simple yet stylish; a great way to reuse what we have left in our wardrobes or from thrift store finds!

_________________________________________________________


You Will Need:

• Collared Shirt
• Seam Ripper • Thread and Needle or Sewing Machine • Button (Scissors), Snaps, or Clasps • Embellishments (Examples:) Decorative Buttons, Beads, Sequins, Gems, Embroidery Patches...

Instructions:

01.) Using a seam ripper, carefully remove shirt collar from shirt.

02.) When the collar is removed there will be two sides, a raw side and clean side to the collar. With matching thread to fabric (as close as possible) hand sew or use machine to sew raw side. Fold raw edge to create a small seam allowance much like the clean side. Pin down raw side if needed when sewing.

03.) Next, sew a button, snap, or clasp to the top left corner flap of the collar. Cut a small hole for a button and sew edges or place other snap/clasp on opposite flap corner (inside facing neck) so the edges connect.

04.) Now comes the best part! Decorate as you wish using your imagination. Even leaving the collar as is can always make a statement to your outfit! Possibilities for this easy necklace idea are endless! First, iron the collar if possible so decorations adhere better. Then glue or sew embellishments to the jewelry piece.

For Visual Creation (Instructions with Pictures): {DIY} Shirt Collar Necklace

_________________________________________________________